
HEARTS, MINDS AND HANDS FOR TOTAL AND HYBRID PROSTHETICS – THE 10TH CANDULOR KUNSTZAHNWERK
Christian Geretschläger
Total prosthetics, today increasingly also overdenture or hybrid prostheses, gives patients everything back, in the mouth and before. It is also the basic qualification in dental technician craftsmanship, to replace what has been lost functionally, anatomically and esthetically.
An essential prerequisite is spatial imagination, as demanded for total prosthetics. It is therefore both the basic and master qualification. Whereby it makes no difference whether it rests on the mucosa, is supported periodontally or is anchored on implants as a hybrid prosthesis.
This year’s competition demanded both: the mandibular prosthesis resting on the mucosa and a hybrid prosthesis with a partly removable circular bridge in the maxilla. In terms of occlusional concept, I decided to employ lingualization according to Prof. Dr. A. Gerber with the Condyloform II NFC+ posterior tooth. CANDULOR has been closely associated with the Gerber prosthetic concept for over 70 years without showing any signs of aging. The company with the big »C« in its logo is dedicated to the permanent monitoring of prosthetic and technical developments in dentistry and the resulting product requirements. The commitment to total prosthetics as witnessed by this contest, the active obligation to transfer the necessary knowhow between dentists and dental technicians, both have a high priority and are recognized internationally. This motivates me time and again to participate in the KunstZahnWerk.
THE CASE TO BE SOLVED
The case is based on providing a restoration for a 65-year old male patient who has been wearing full dentures for years and has been suffering from permanent insufficient retention of the maxillary denture despite numerous new fabrications.
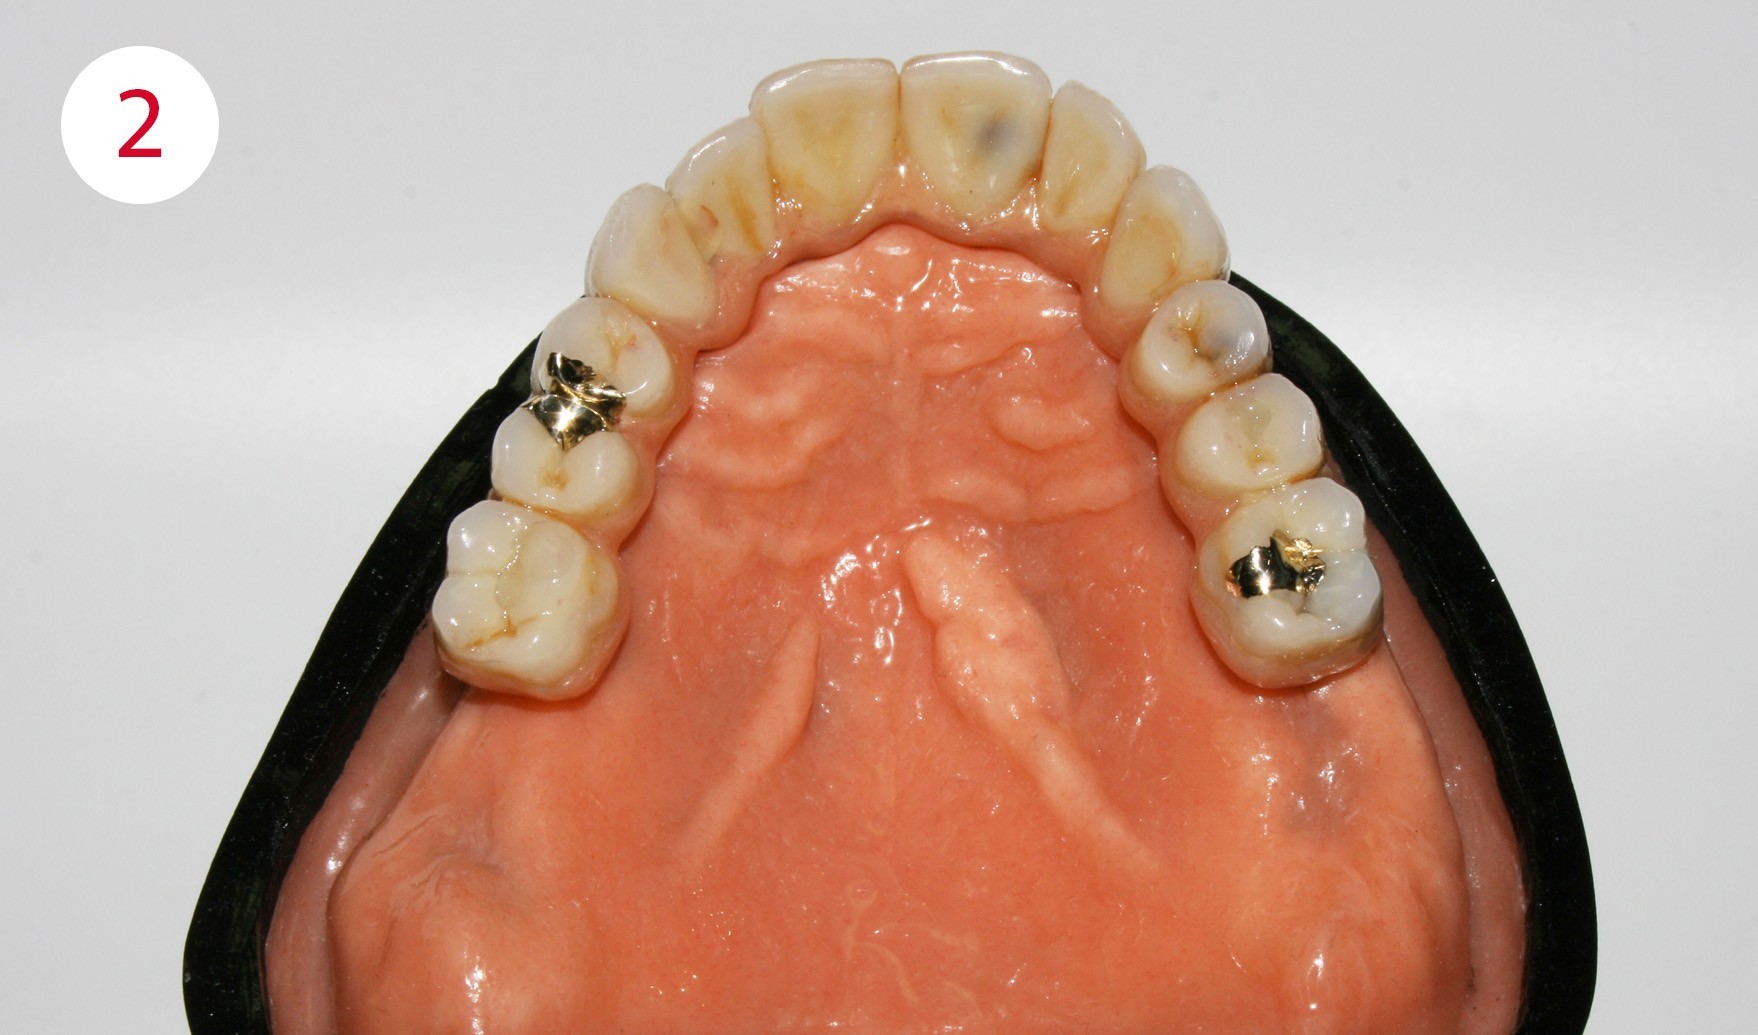
Following a comprehensive clinical and radiological diagnosis, six implants (CAMLOG) were placed in the maxilla for a partly removable, screw-retained bridge in hybrid format. The mandible was restored with a full denture in neutral bite position. The design of the maxillary restoration was to allow cleaning between the implants with interdental brushes as in the clinical case. The oval pontic support was not to display any saddle-like shape and had to be cleanable with dental floss.
For reproduction purposes, the participants received models including the lab analogs, caps and prosthetic screws as well as a plastic guide adapted to the patient situation where the labial contour corresponded to the lip profile as well as the buccal cheek contact. A CANDULOR articulator or condylator was required for mean value orientation of the model for the solution according to the Gerber method and the condylar theory it is based on. In this case, the condyle path angle was to be set to 30° on the right and to 28° on the left with reference to the patient case.
Fig. 1: Implant situation hybrid prosthesis in the maxilla
Fig. 2: Hybrid prosthesis in the maxilla


BACKWARD PLANNING WITH BLUEPRINT
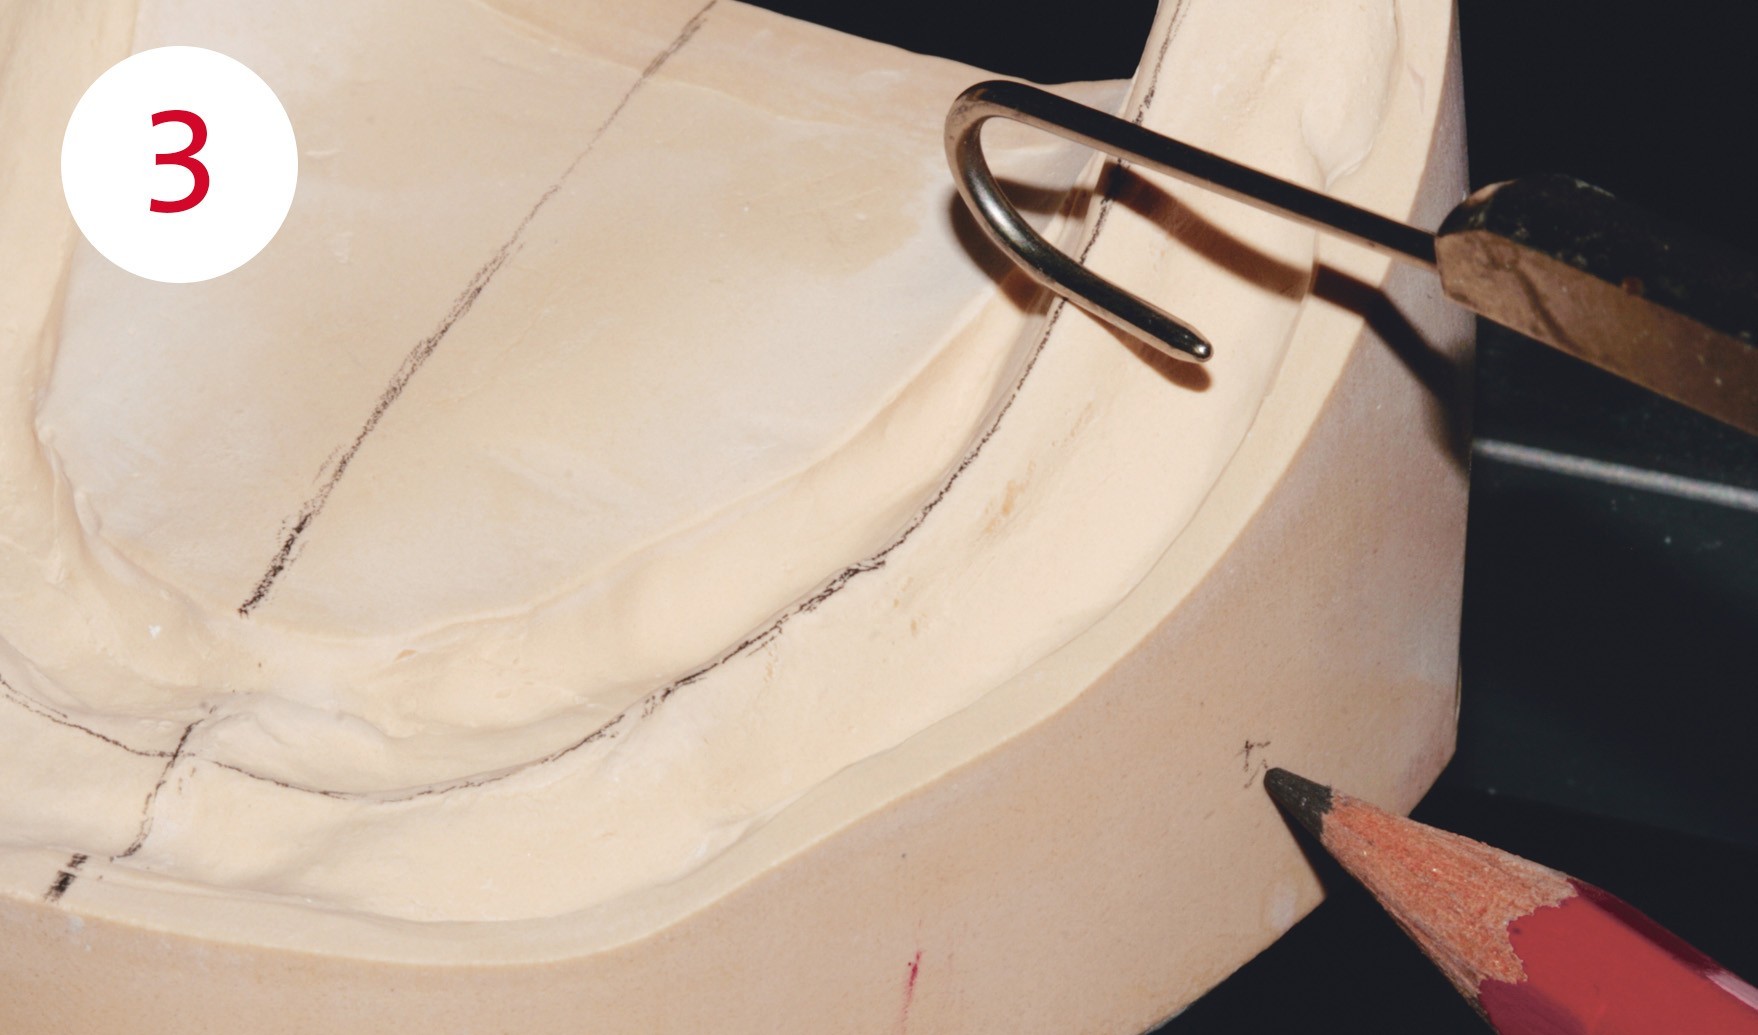
Prior to tooth setup according to the backward planning principle, the blueprint is prepared in form of a model analysis according to Peter Lerch, which he developed for the full denture concept according to Gerber. The objective of model analysis is to find out in which areas loading can be transferred safely to the upper and lower denture support, taking into account the atrophy of both jaws, and to avoid tilting of the dentures and protrusion of the mandible during tooth-guided movements. At the same time, the position of the largest chewing units (position 6), the sagittal corridor for the load-bearing lingual cusps (pistil/cupola) and their antagonistic contact areas (mortar/cavity) are determined. Finally, the transversal bite position is determined. In this case the normal bite. Without a plan there is no (self) control, no success, and therefore marking the statically relevant lines on the model borders and outer surfaces is essential.
Fig. 3: Contour of the alveolar ridge for determining the position of the static chewing center in the mandible
Fig. 4: Stop line (red), behind which the contacts end to avoid protrusion
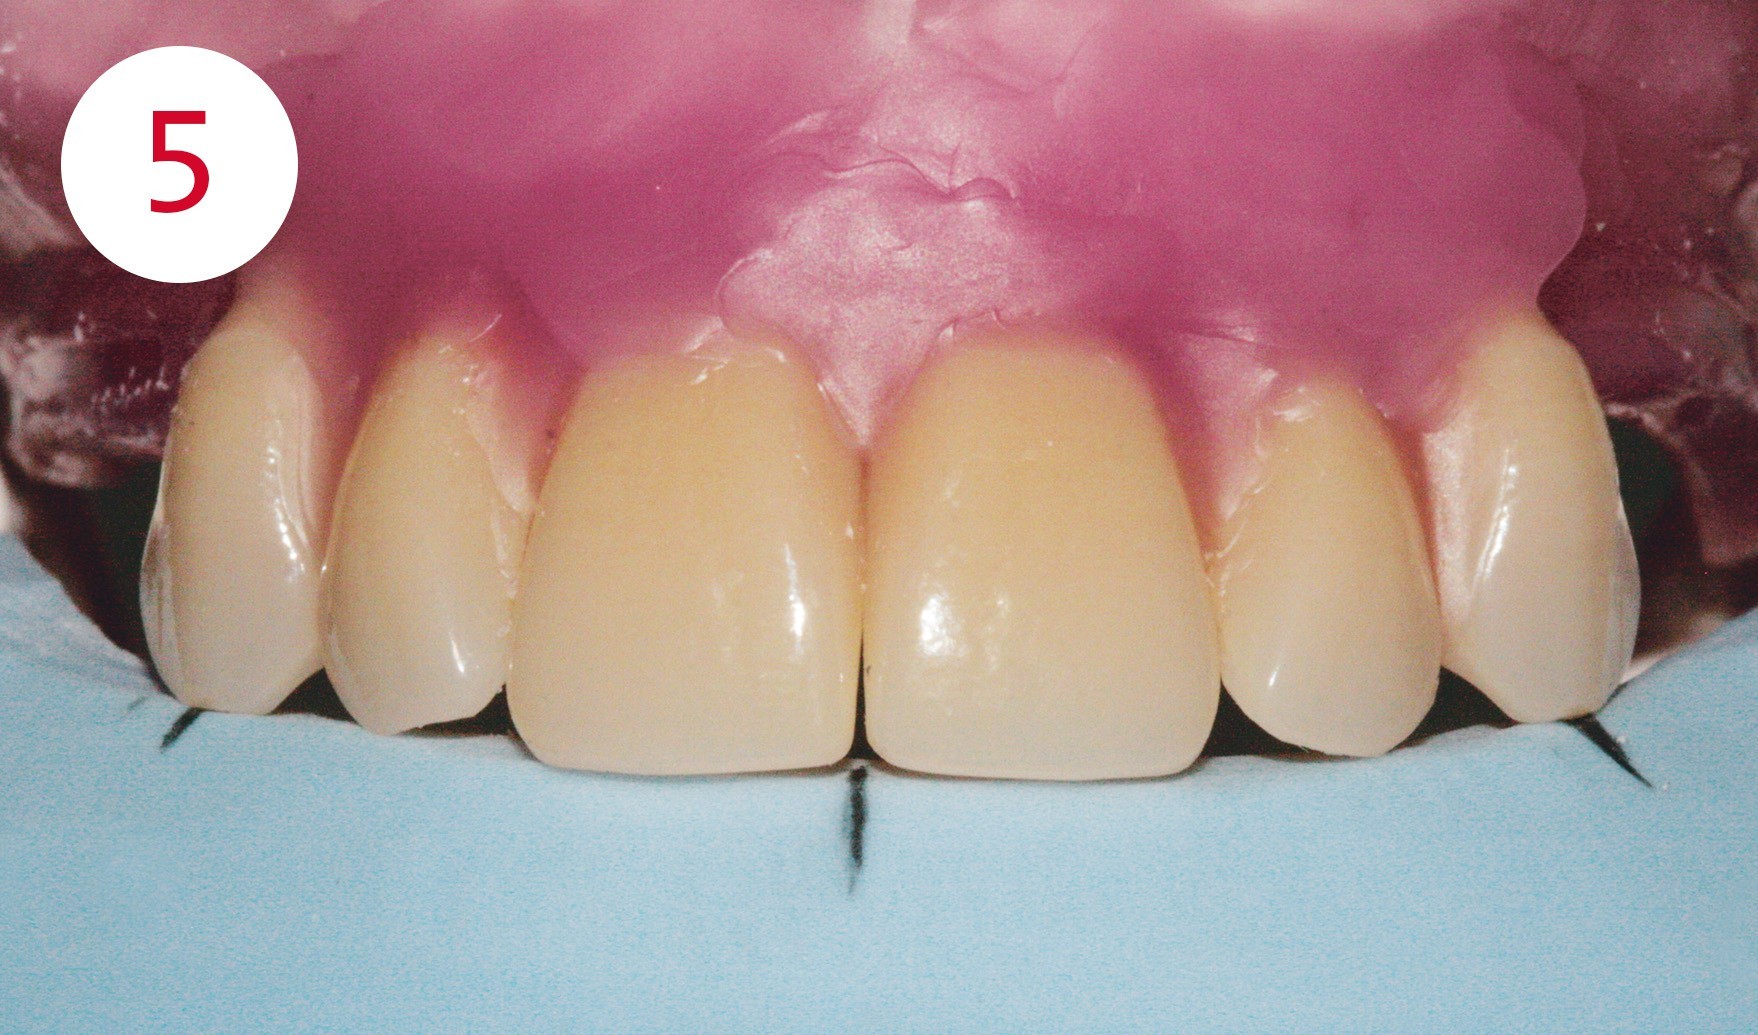
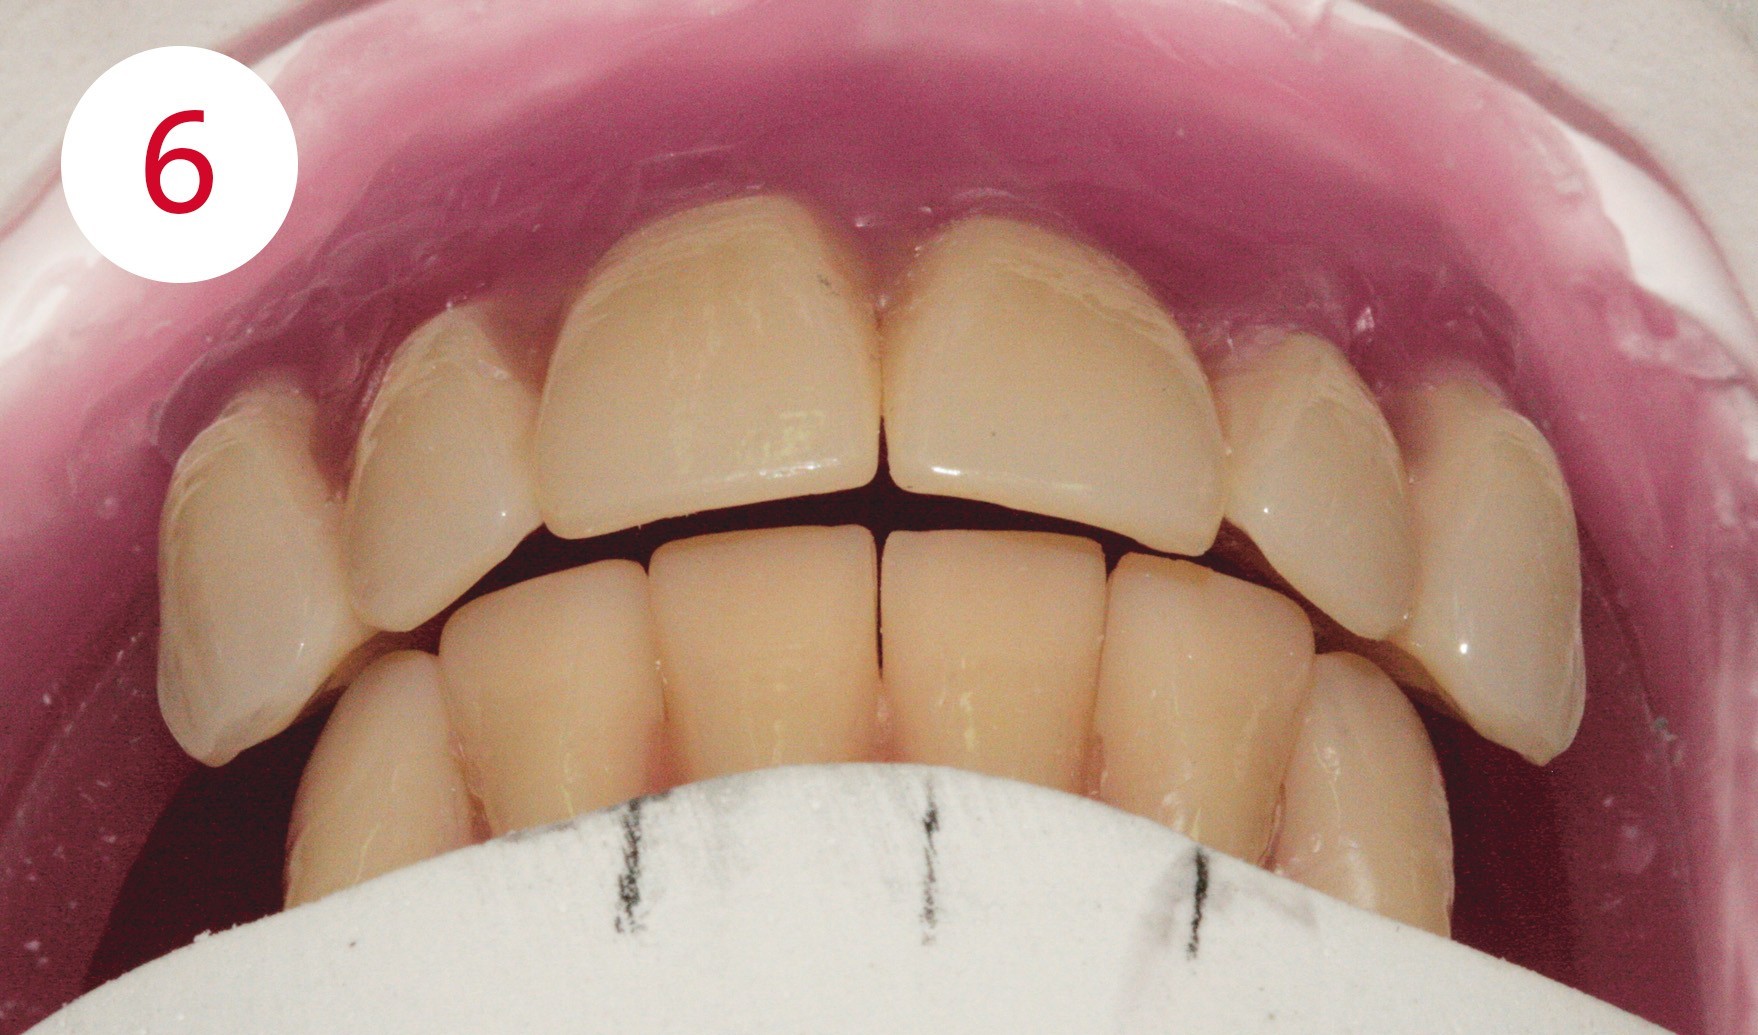
Fig. 5+6: Incisal edges and cuspid tips (slight mesial inclination) correspond with the markings of the silicone guide
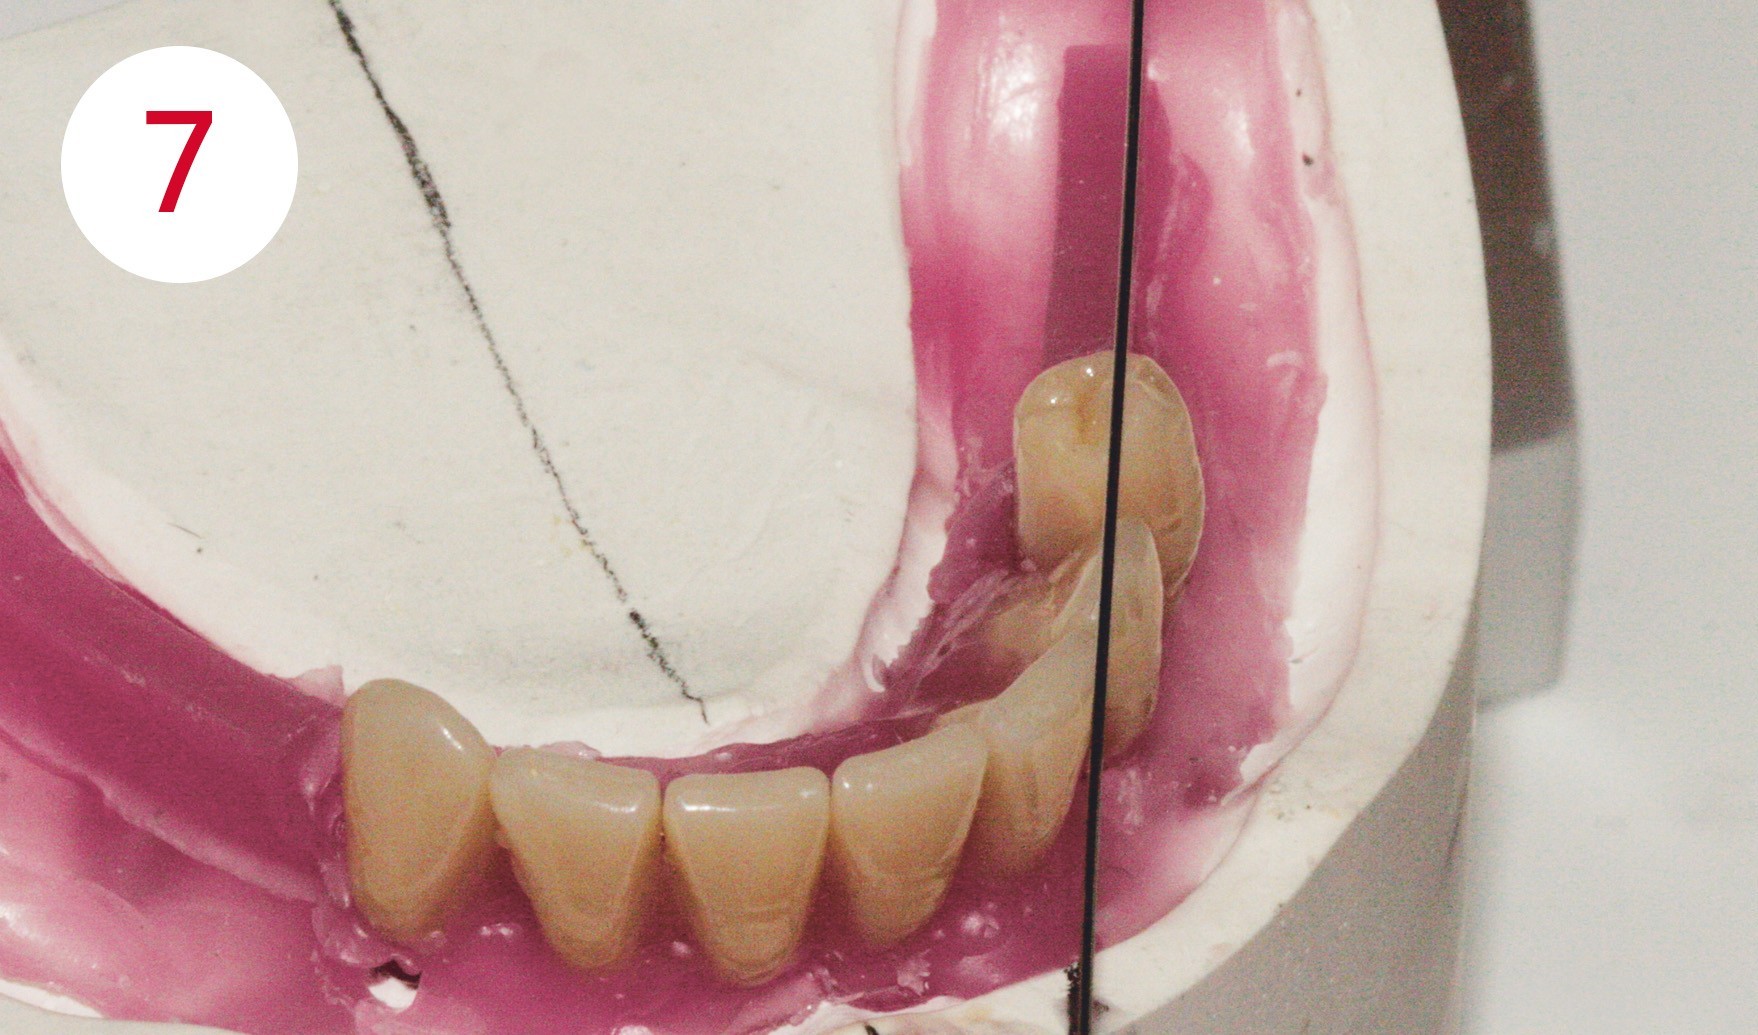
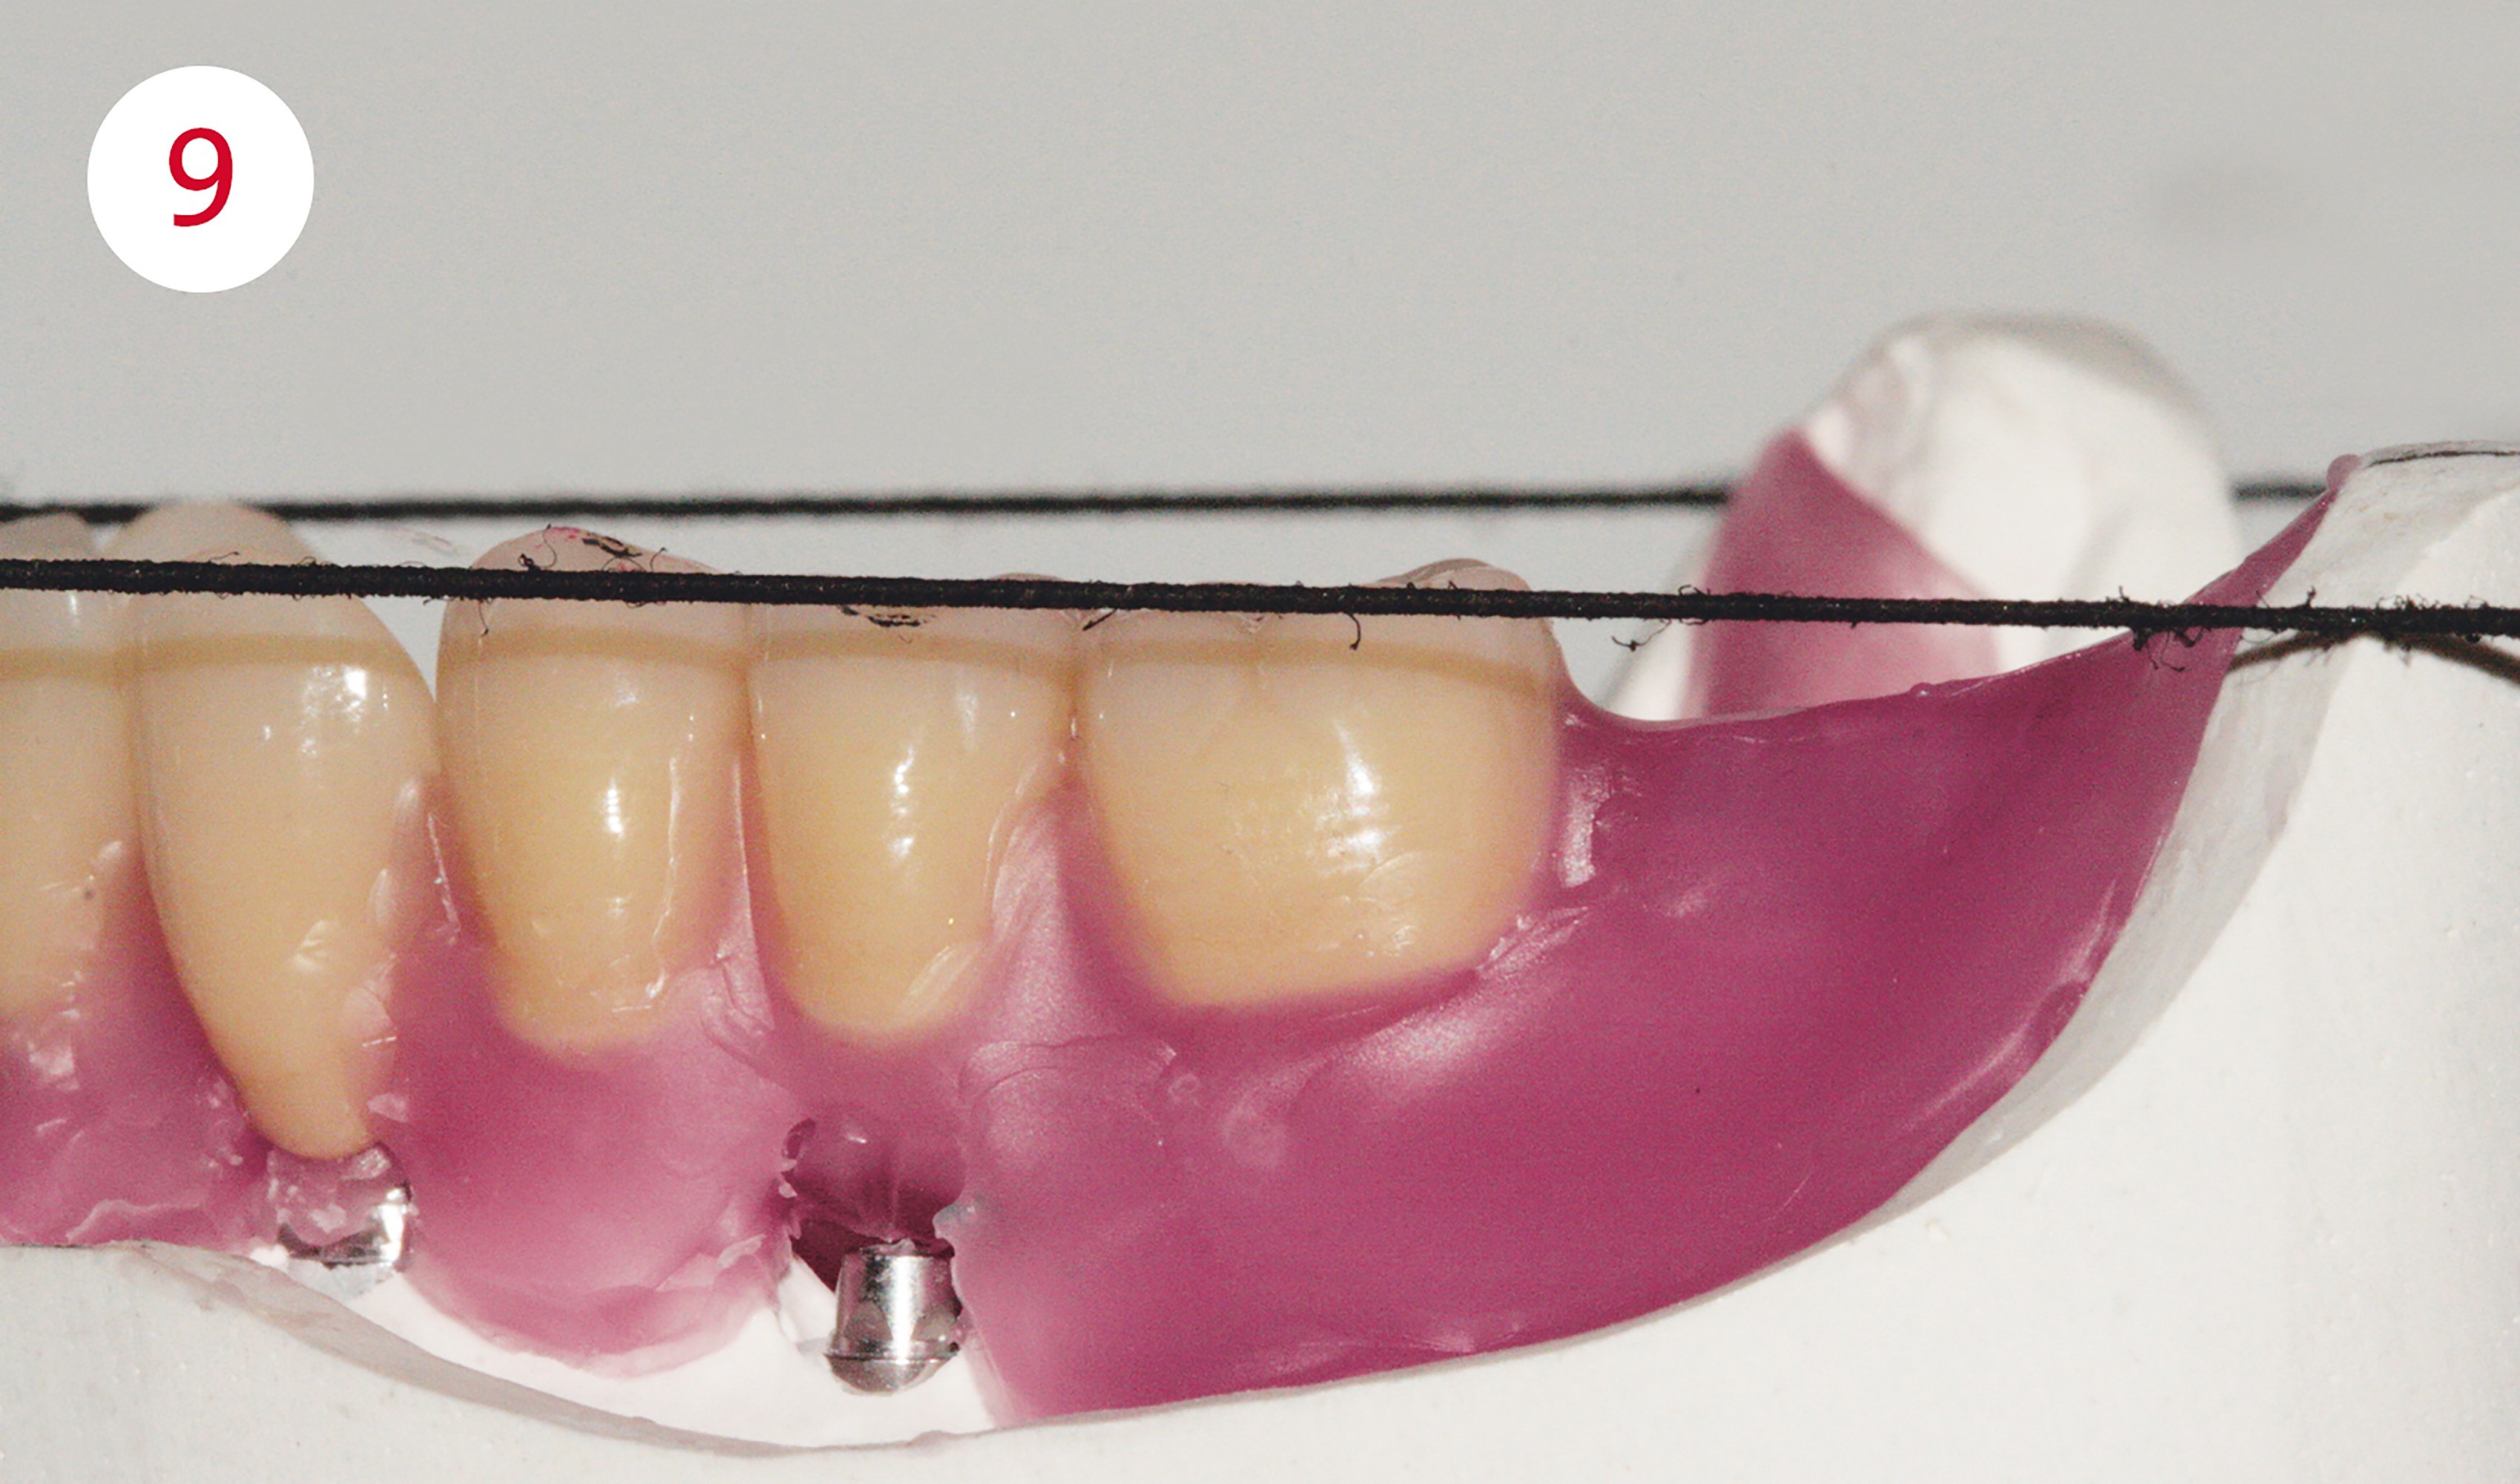
Fig. 7: Gerber principle: buccal cusps of the lower 4s are located on the static line
Fig. 8: The »sagittal curve«
TOOTH SETUP
This begins with setting up the anterior teeth according to the mentioned specifications; the sequence is 11/21, 13/23 and 12/22. With the help of the Condyloform posterior tooth concept, developed and already patented by Gerber, the posterior tooth rows are then set up analogously to the applicable sequence of steps for this purpose. The PhysioStar anterior teeth and Condyloform posterior teeth would probably have convinced Gerber (1907 - 1990) as a further development of his originals if he were still alive. Among other things, their undisputed advantage is the self-locating centric due to the mortar-pistil principle (BC contacts). Their mirror-inverted morphology analogous to the contour of the joint head and the joint cup, with the exception of the 4s, allow joint-oriented guidance of the teeth with statically stable calotte-like support. This is of advantage in case of narrow sagittal support corridors without ignoring cheek support through transversal volume, and due to their lingualization this reduces destabilizing buccal contacts which could cause damaging horizontal pressure on the pillars in the case of periodontally or implant-supported removable dentures.
The task of the competition demonstrated how up-to-date and future-oriented this occlusion concept could be implemented with originals, which are permanently adapted to the increasing demands on materials, material combinations, handling as well as current patient expectations, and thus prove to be an advantageous choice for removable prosthetics.
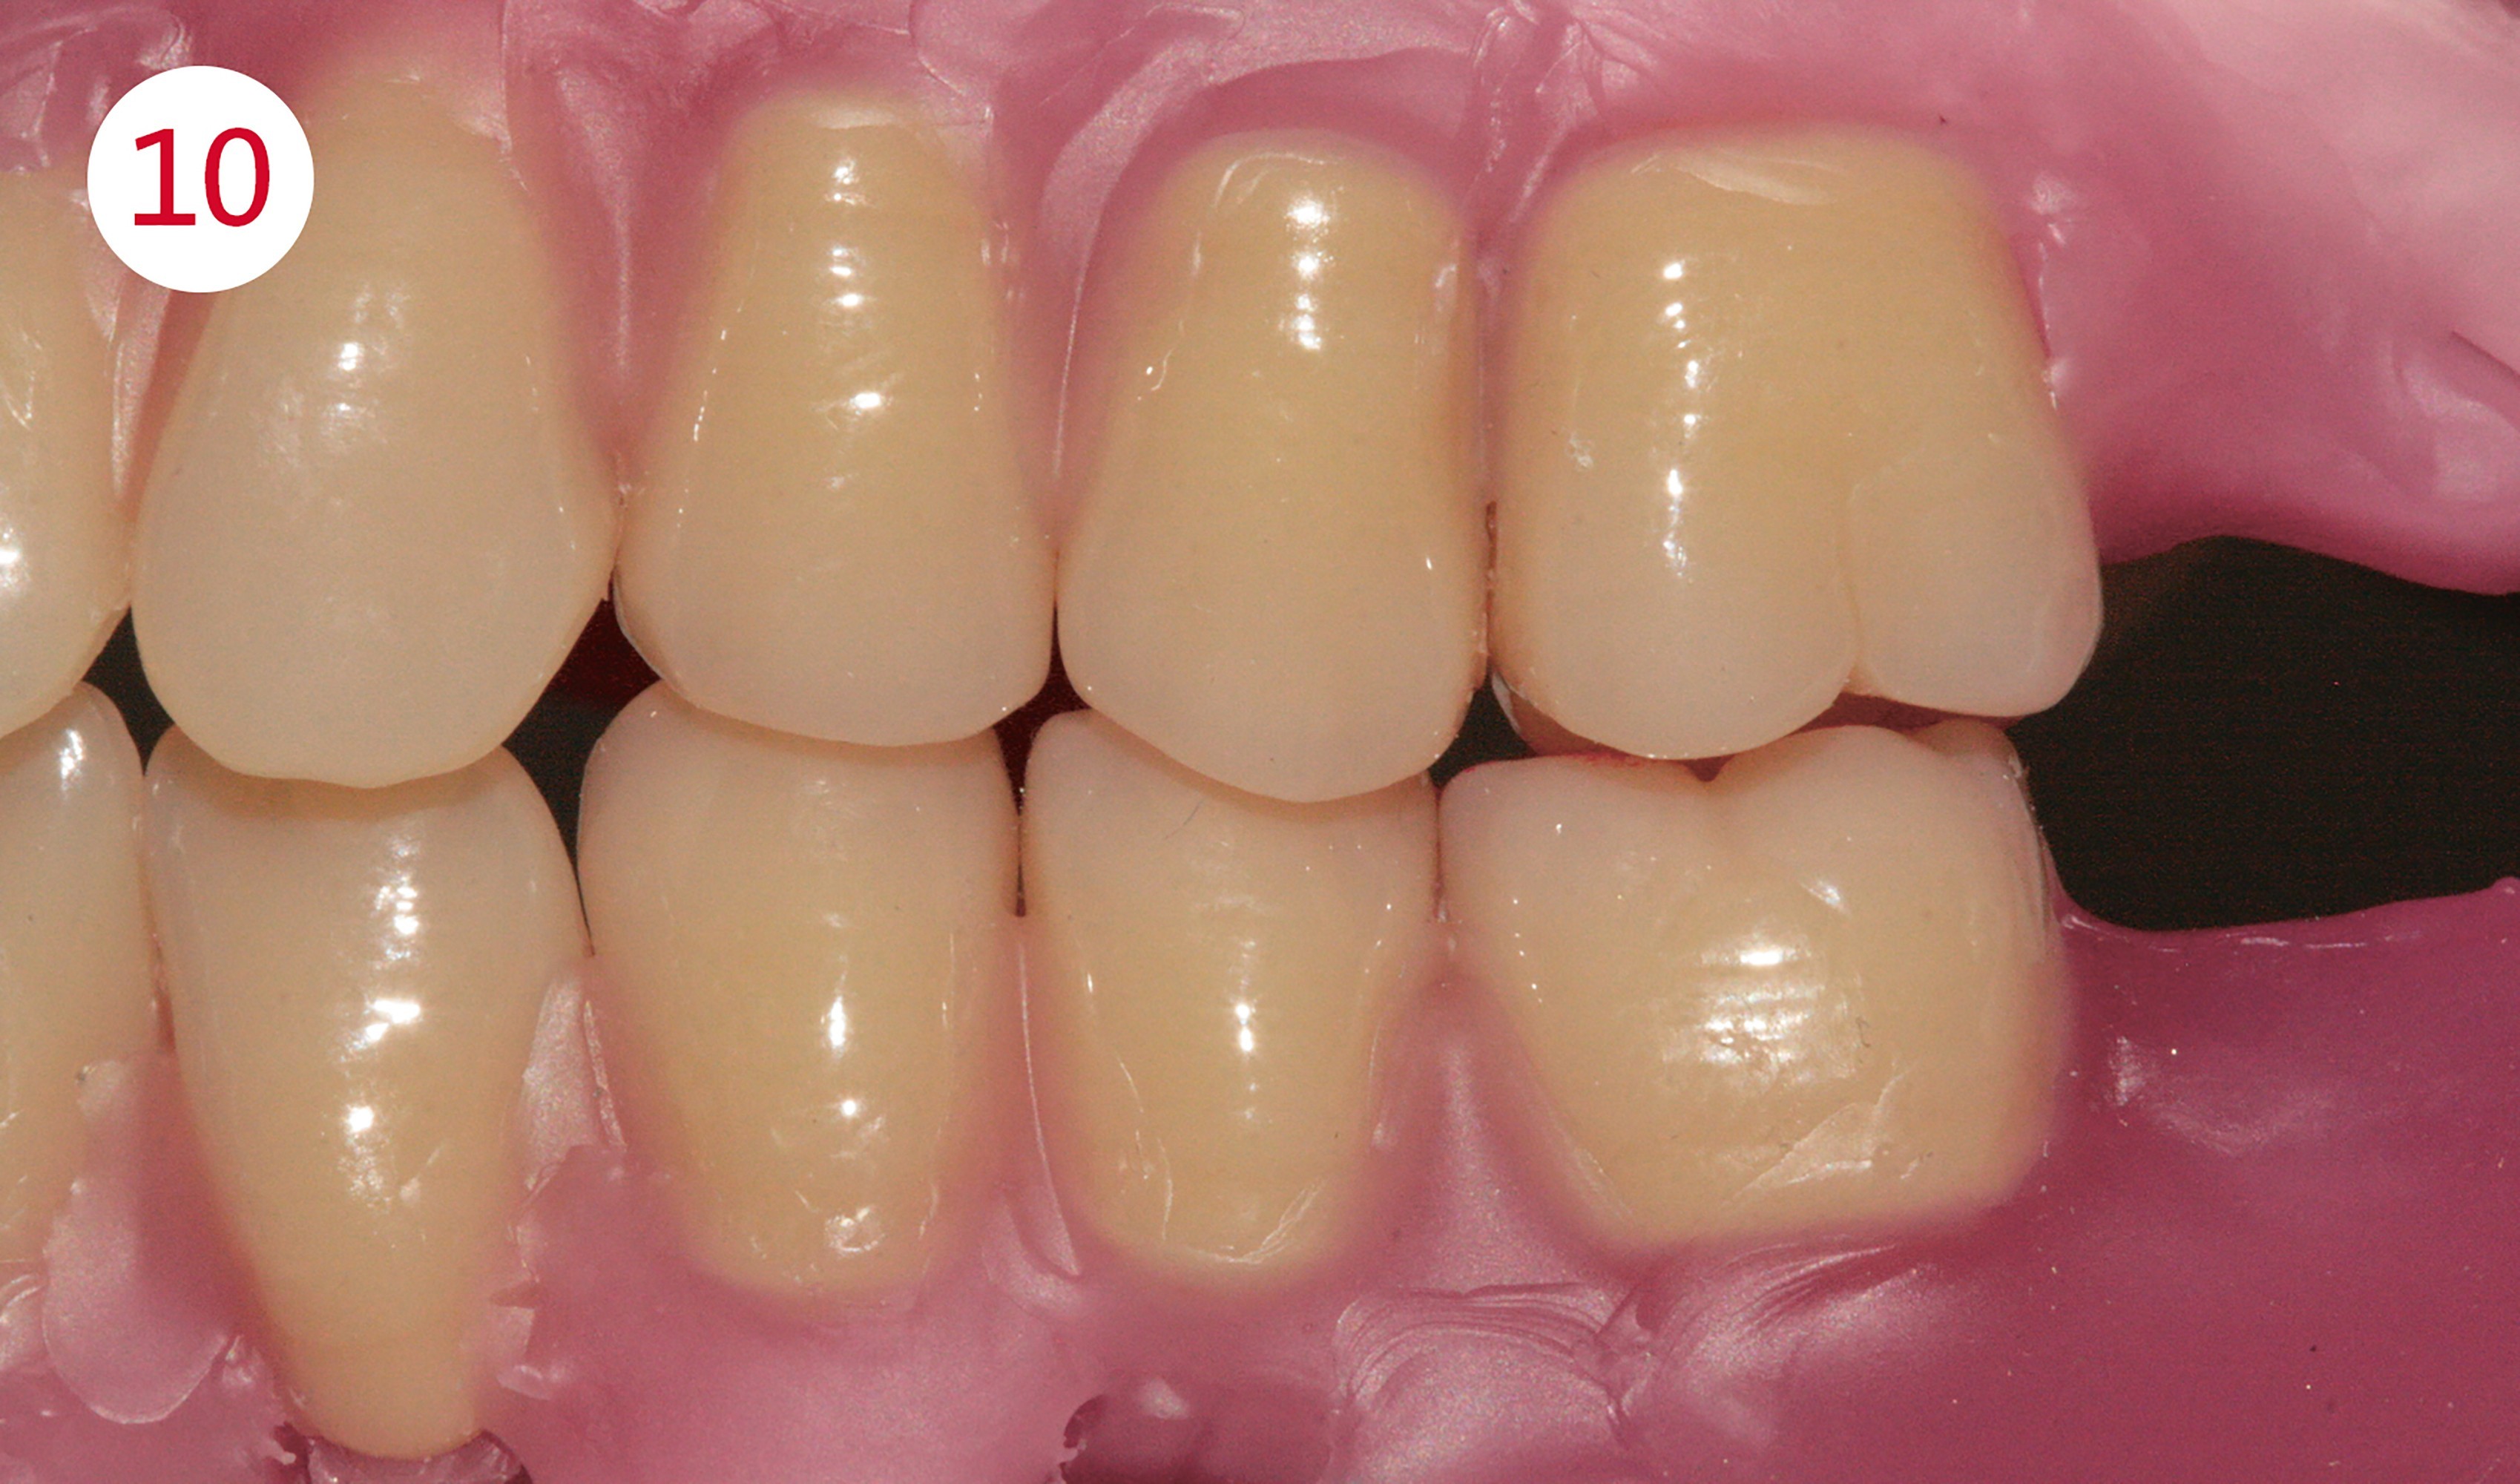
Fig. 9: Centric contact of the 4s: lower buccal cusp has contact in the upper centric fossa
Fig. 10: Autonomous chewing stability and protection of the implants against horizontal impetus through tooth-to-tooth occlusion
DENTURE BODY
Next to esthetic aspects this also embodies functional aspects for supporting the neuromuscular balance and thus the retention of the denture. This is determined both by the tooth position in conjunction with the atrophy profile and the balance between denture body and muscle. The length and thickness of the denture border, the contour of the denture body, as well as the position and profile of the frenulum, are the relevant factors.
The relevant muscles here are the M. masseter (buccal, in the molar area), M. buccinator (buccal, in the premolar area), M. orbicularis oris (labial, anterior tooth area), M. mylohyoideus (paralingual, posterior tooth area), M. geniohyoideus and genioglossus (sublingual, bottom anterior teeth) as well as the tongue.
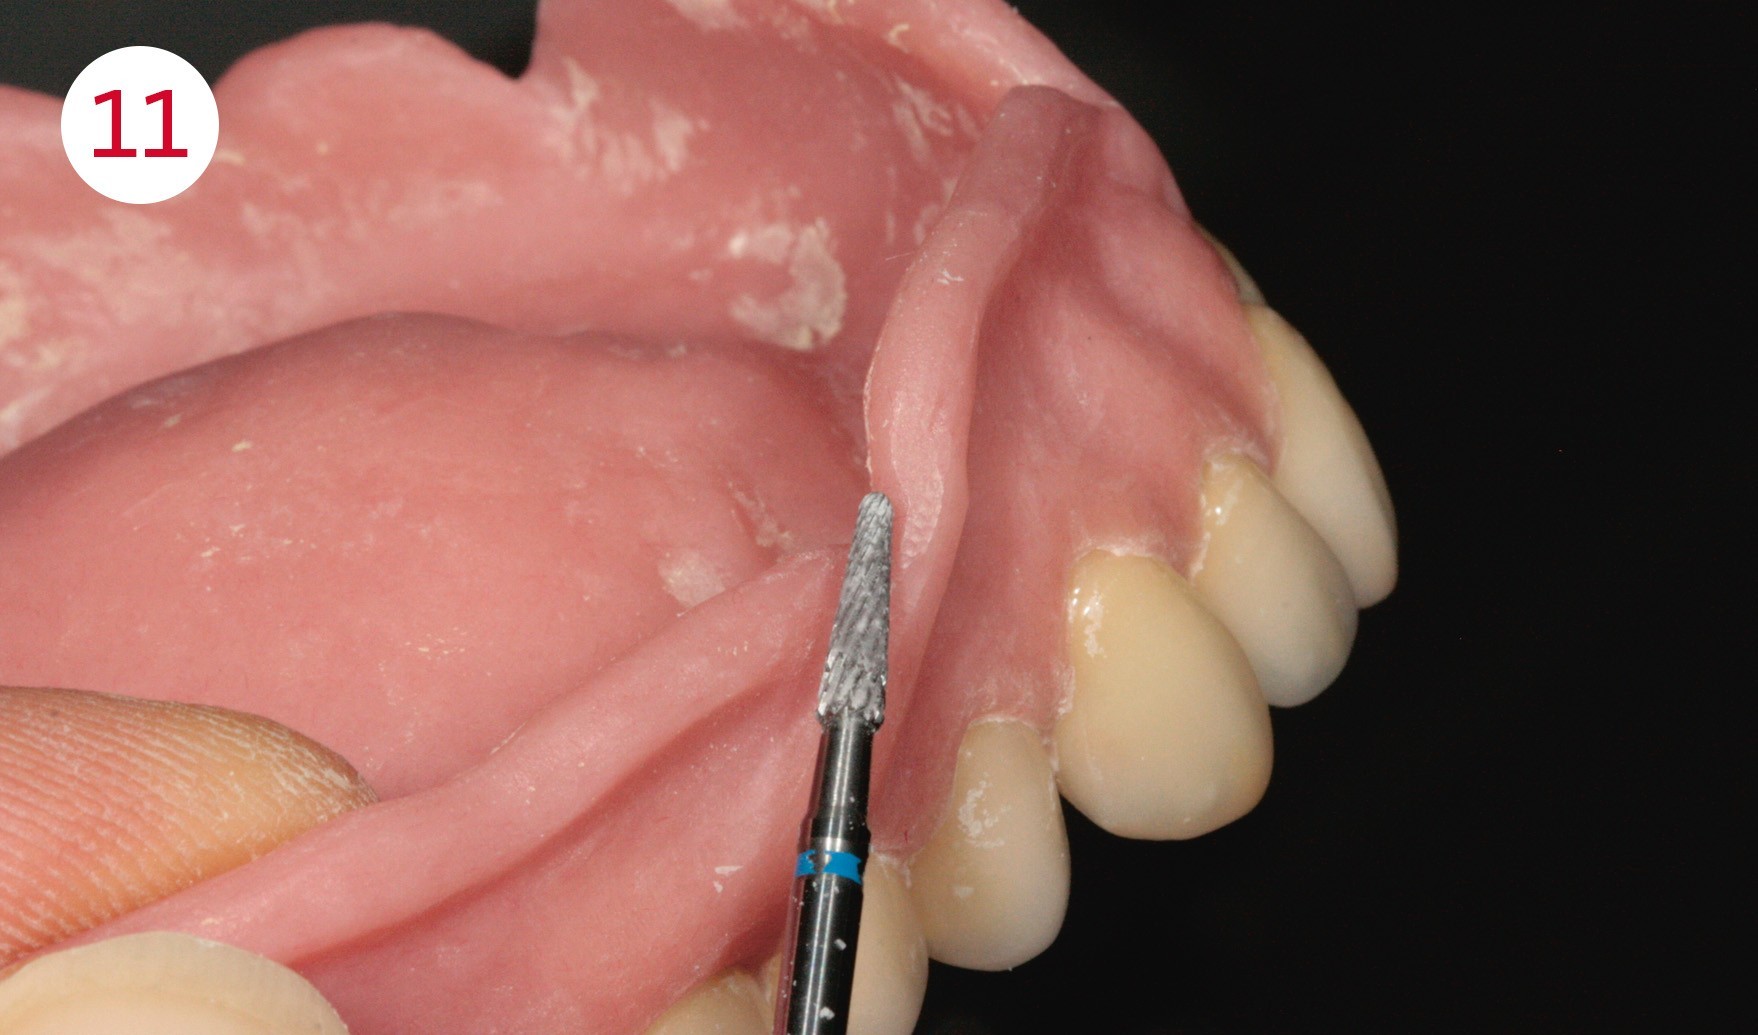
The labial shields for the mouth ring muscle are fabricated in the anterior region. Here Lerch specifically points out that the smile line lies closely behind the apex between the convex and concave contour transition. Buccinator supports are created in the posterior tooth region and the pull direction is reflected in the frenulum recesses. In order to retain an age-appropriate, naturally acting gum line, the interdental spaces are designed in an irregular manner, partially with somewhat extended clinical crowns. The transitions from the teeth to the gums are not contoured bulbous for reasons of denture hygiene, but rounded and tapered flat towards the tooth neck.
Fig. 11: Frenulum freedom in pull direction with performed work as an example
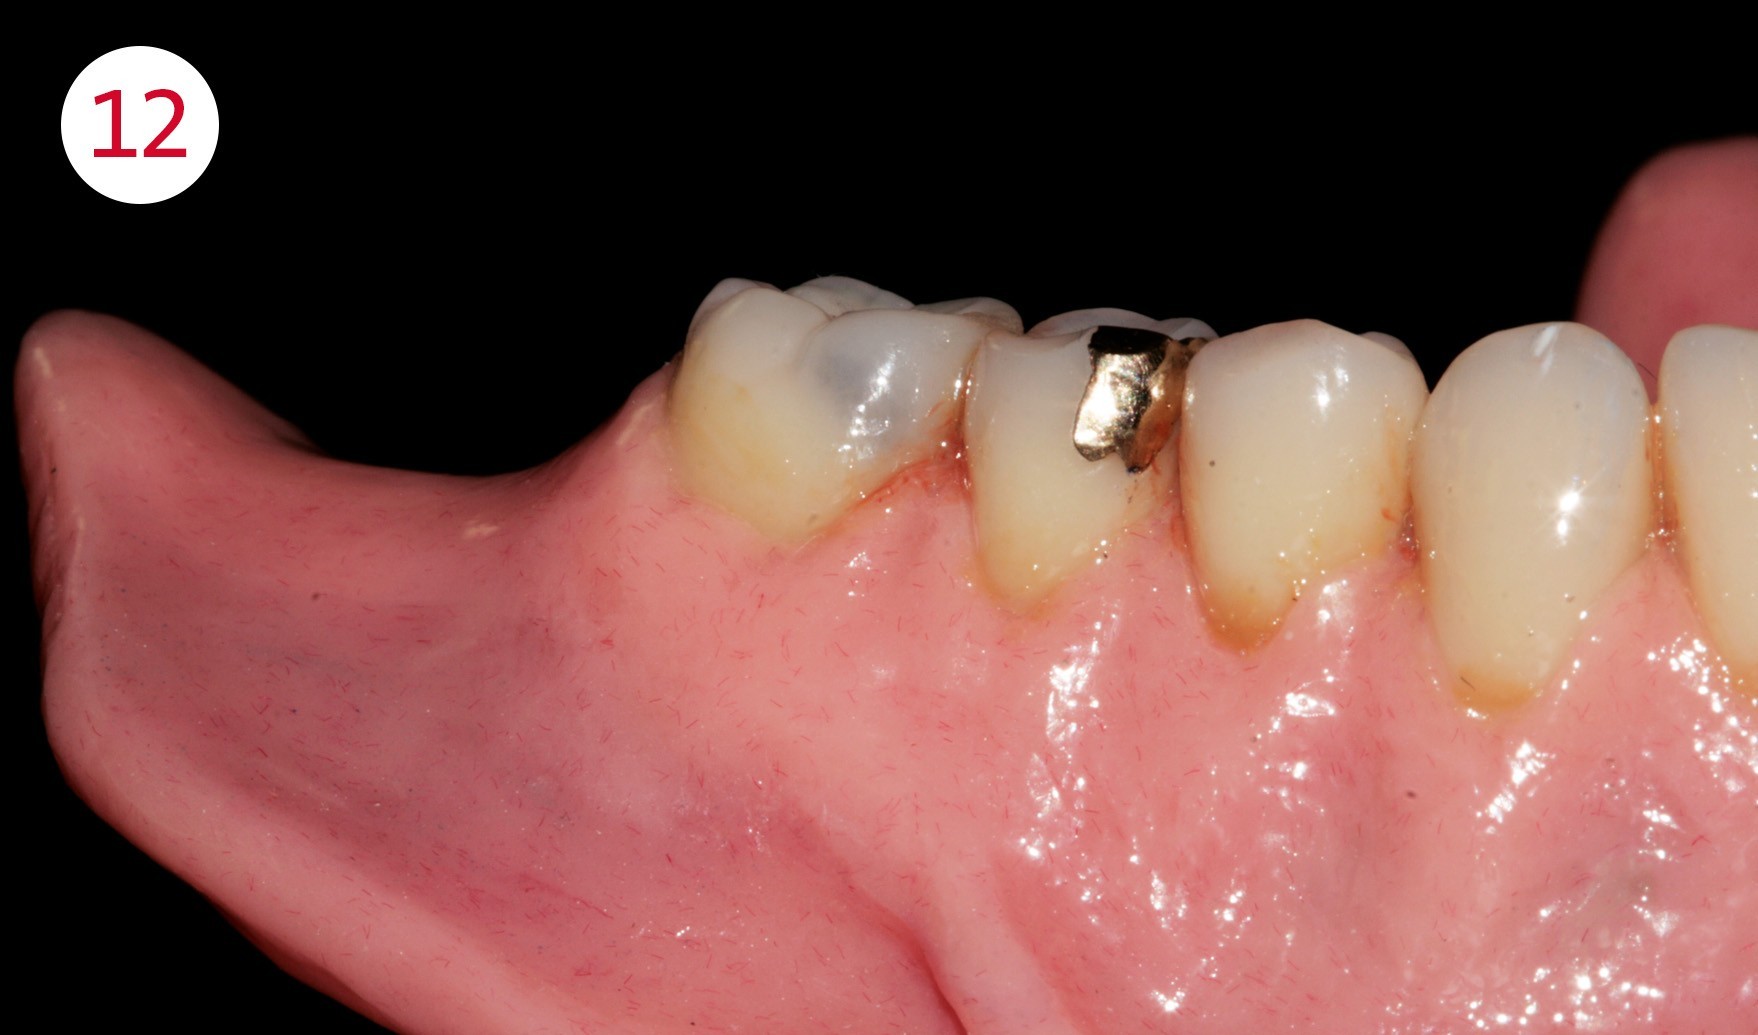
Fig. 12: »Muscle retentiveness« for stabilizing the position of the denture
NPM FRAMEWORK - PARTLY REMOVABLE BRIDGE IN MAXILLA
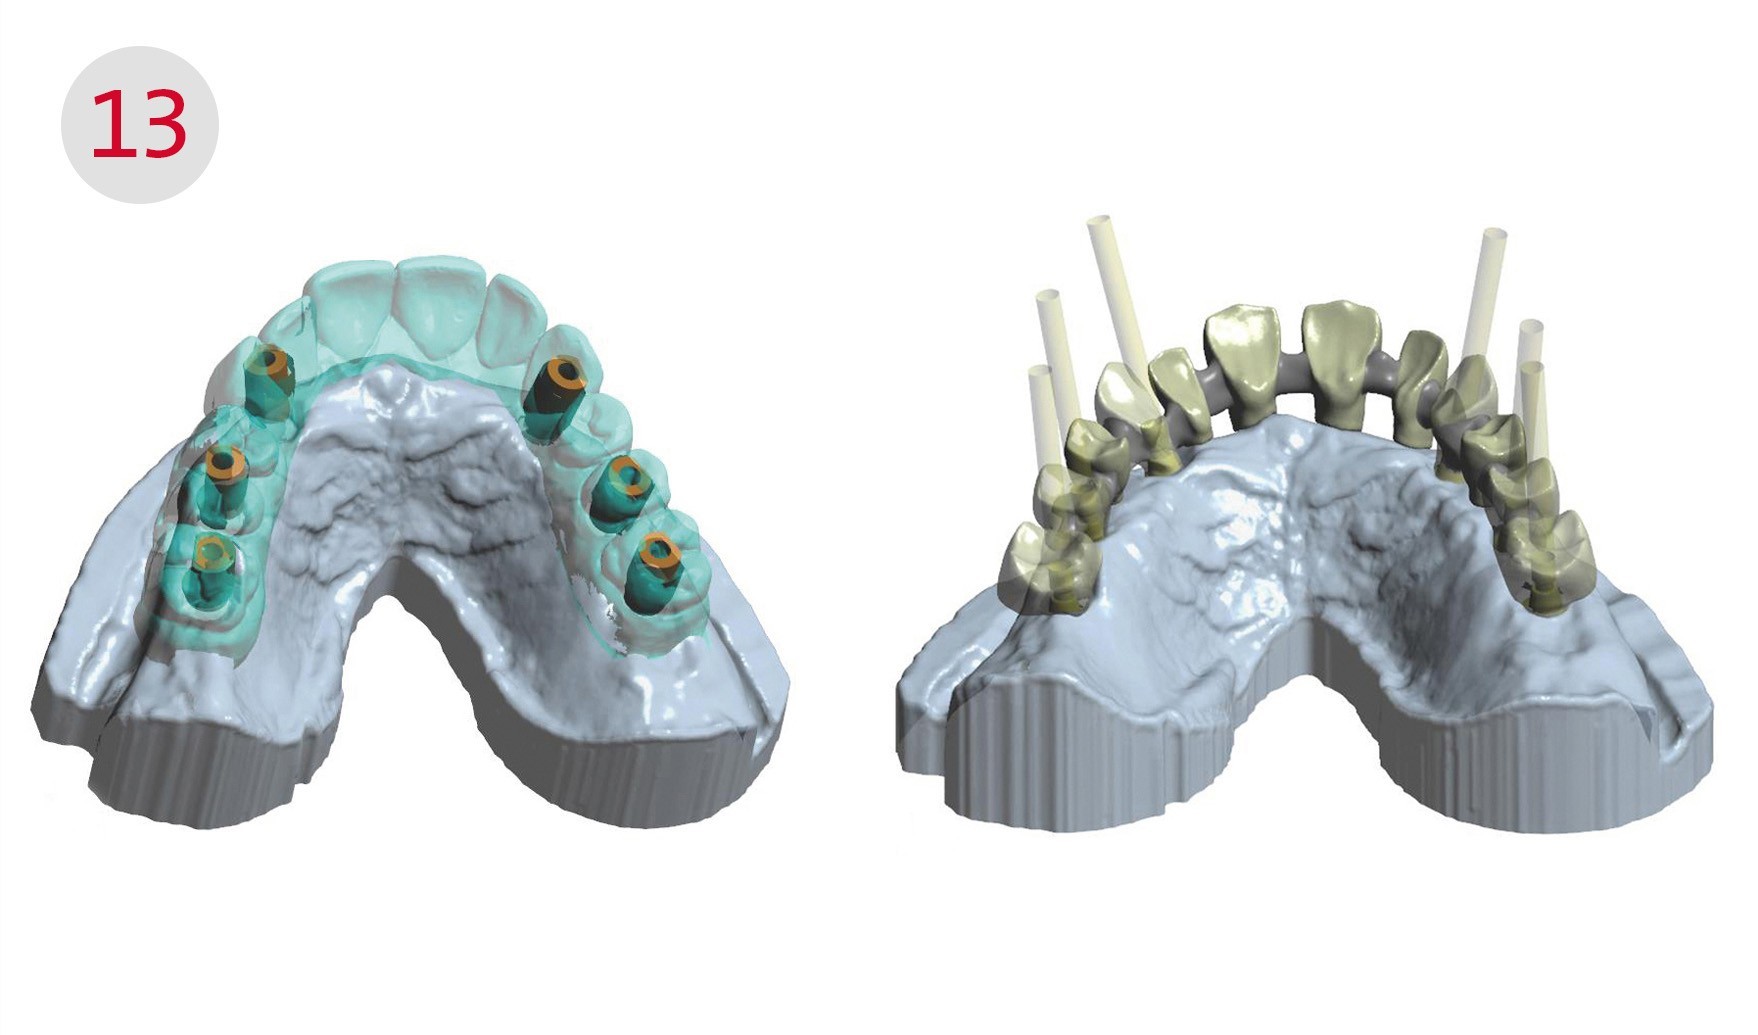
The setup is removed from the model and the scanbodies screwed to the implants. Then the model, the counter-bite, here the mandibular setup on the model, are scanned. Once the implant positions have been determined, the scanbodies are removed and the maxillary setup is placed on the model and also scanned. This is followed by inserting both models into the articulator and scanning the bite. Now the construction software is used to design the metal framework which is then milled from NPM. The milled framework is checked for surface quality and tension-free fit, then it is sandblasted, silanized and opaquer is applied.
Fig. 13: left - Scan with wax setup, right - The designed framework for the hybrid prosthesis

BEAUTY COMES FROM WITHIN
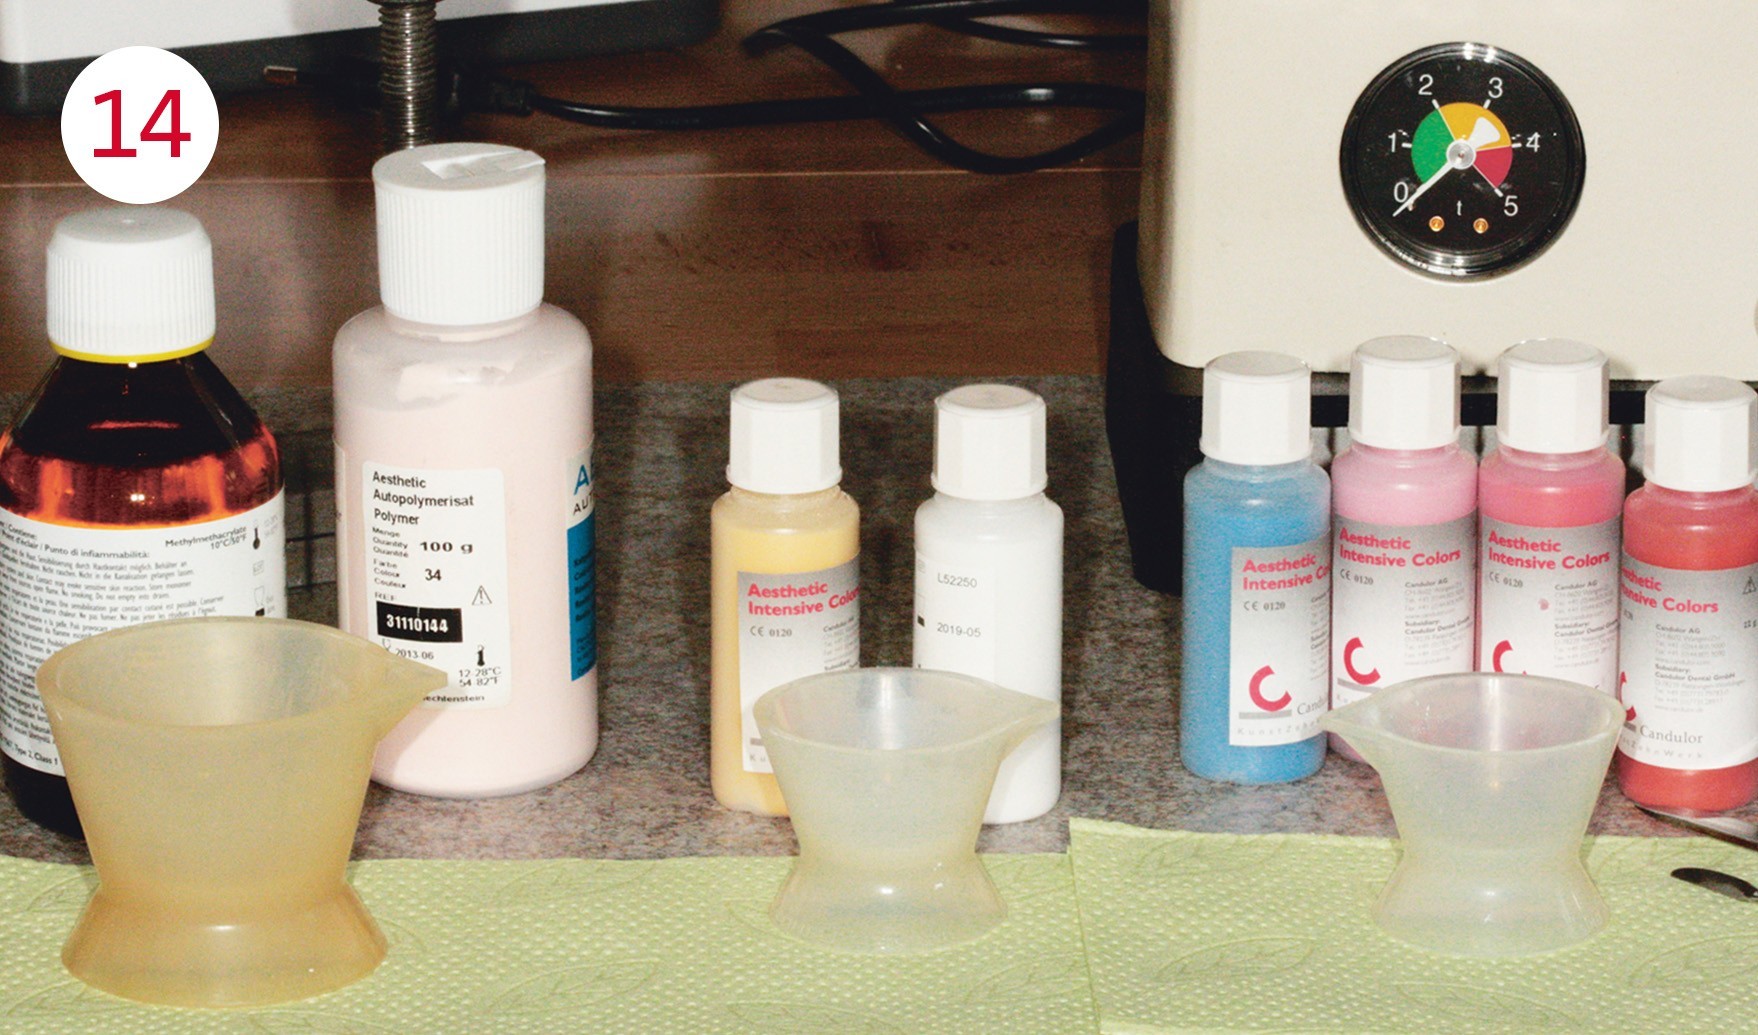
If the base of the prosthesis is colored, it is better to use the sustainable insertion technique and not externally applied stains. The advantage of insertion is embedding the colors in the resin of the prosthesis base, as the basis resin and AESTHETIC Intensive Colors have the identical chemical composition: PMMA. This results in a chemically stable, homogeneous chemical compound. As a consequence, the colors do not »age« as fast, for example, they are not abraded during cleaning of the prosthesis and do not crack during wear like weathered varnish on a wooden frame. The following sequence is helpful for achieving the coloring effect from within: papillae, tooth roots, vestibular shield, labial frenulum and finally the base of the prosthesis. This is prepared with the AESTHETIC BLUE prosthesis resin in shade 34 and is also the basis for mixing with the intensive colors to create a harmonious impression.
Shade 34 is mixed with the AESTHETIC Intensive Colors yellow and white for the papillae and tooth roots. Shade 34 and the intensive colors red, brown, blue and pink are used for the vestibular shield and the frenulum. The marble effect of the vestibular shield is best achieved if the resin mass is not mixed too intensively.
The KunstZahnWerk is unique and has all the makings for the »Dental Oscar« in the discipline of removable prosthetics. Everyone participating, be it as master, technician or trainee, motivates themselves and others and demonstrates what dental technicians are capable of as healthcare craftsmen.
Fig. 14: Color comes from within: AESTHETIC Intensive Colors for insertion into the base resin
Fig. 15: The finished result of MDT Christian Geretschläger can really be seen. This work is the proof, that »total prosthetics« represents a big challenge and demands a lot of knowledge
IMPORTANT / You can find the complete photographic material for this article in the PDF of the specialist articles, which can be downloaded below.
MATERIALS
Plaster
Rocky Mountain (Class 4)
Artigips
Arti STAR (Class 4)
Articulator
Articulator CA 3.0 (CANDULOR)
Duplicating silicone
Citrosil citron (Class 4)
Putty silicone
Fifty Fifty (Class 4)
Modelling wax
AESTHETIC Wax (CANDULOR)
Modelling wax, stained individually
AESTHETIC Color Wax (CANDULOR)
Prosthesis resin
AESTHETIC BLUE (CANDULOR)
Gingiva characterization
AESTHETIC Color Set Easy (CANDULOR)
Prosthetic teeth, composite
PhysioStar NFC+ / Condyloform II NFC+ (CANDULOR)
Composite material / metal-resin
Metal primer (GC Europe)
Composites,characterizing teeth
Sinfony (3M Espe)
Pink opaquer
Sinfony (3M Espe)
Implant system
Comfour System (Camlog)
Alloy
NEM (Camlog/Dedicam)


2017
KunstZahnWerk, 1st place: best competition entry
Member in the DGÄZ
2011
Klaus-Kanter prize, 2nd place
KunstZahnWerk, prize for the best print documentation
2010
Master craftsman in the Dental Laboratory Kornexl, Breitenberg
Master‘s certificate in Munich, best of year
2001 – 2009
Dental technician in Dental Laboratory Kornexl, Breitenberg
accompanied by regular further education
2001
Basic national service as dental technician, Army Hospital Amberg
1996 – 2000
Training as dental technician in Dental Laboratory Kornexl, Breitenberg